
How DTF Printing Works: The Step-by-Step Process
Many customers are new to DTF printing and want to understand how the full process works. DTF (Direct-to-Film) printing is actually simple, efficient, and perfect for producing vibrant, durable prints on all types of fabrics. Here’s an easy step-by-step guide to help you understand how it works.
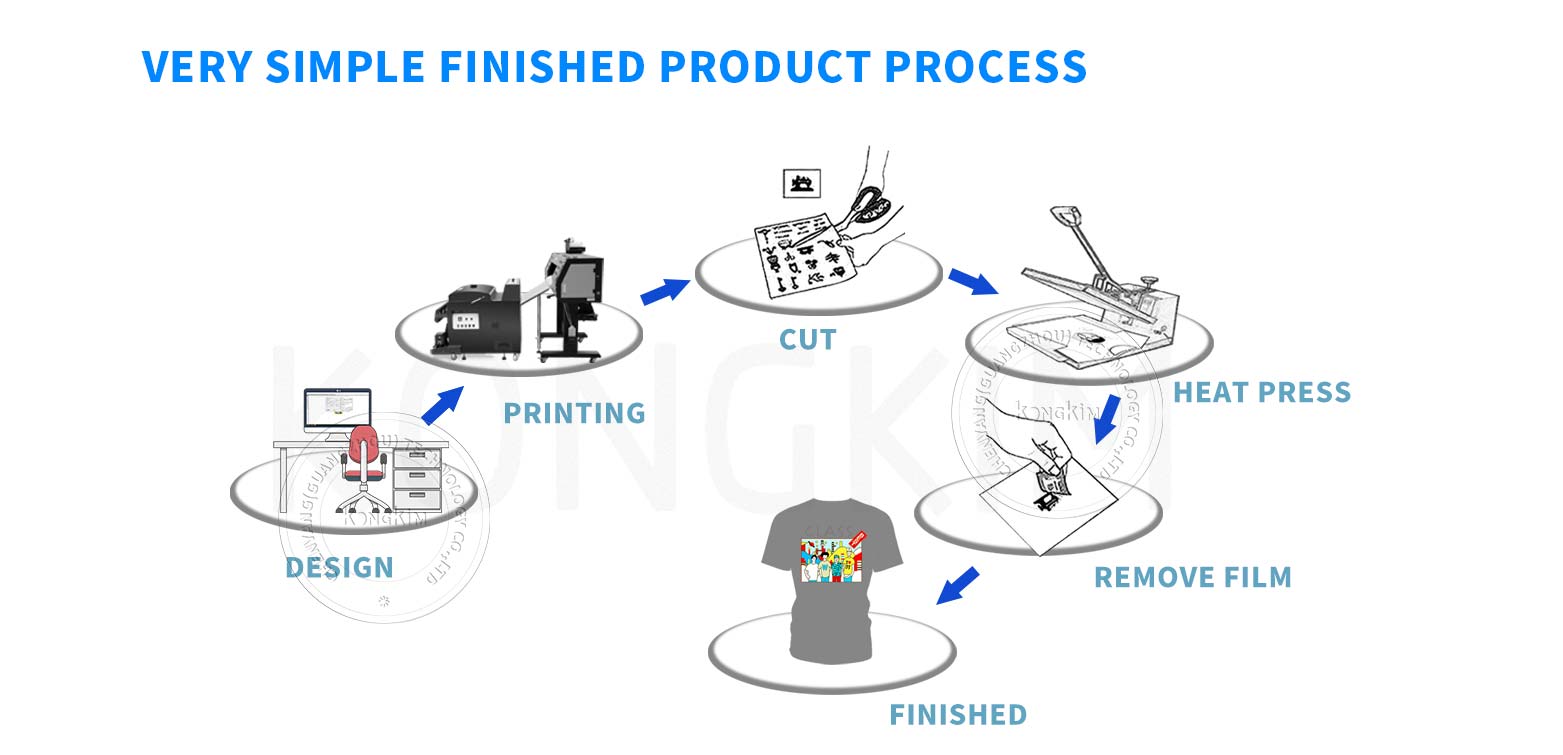
1. Create the Design in Graphic Software
Everything starts with your artwork. You can design using software like Photoshop, Illustrator, or CorelDRAW. Once the design is ready, it’s imported into your RIP software to prepare the color layers and white ink layout.
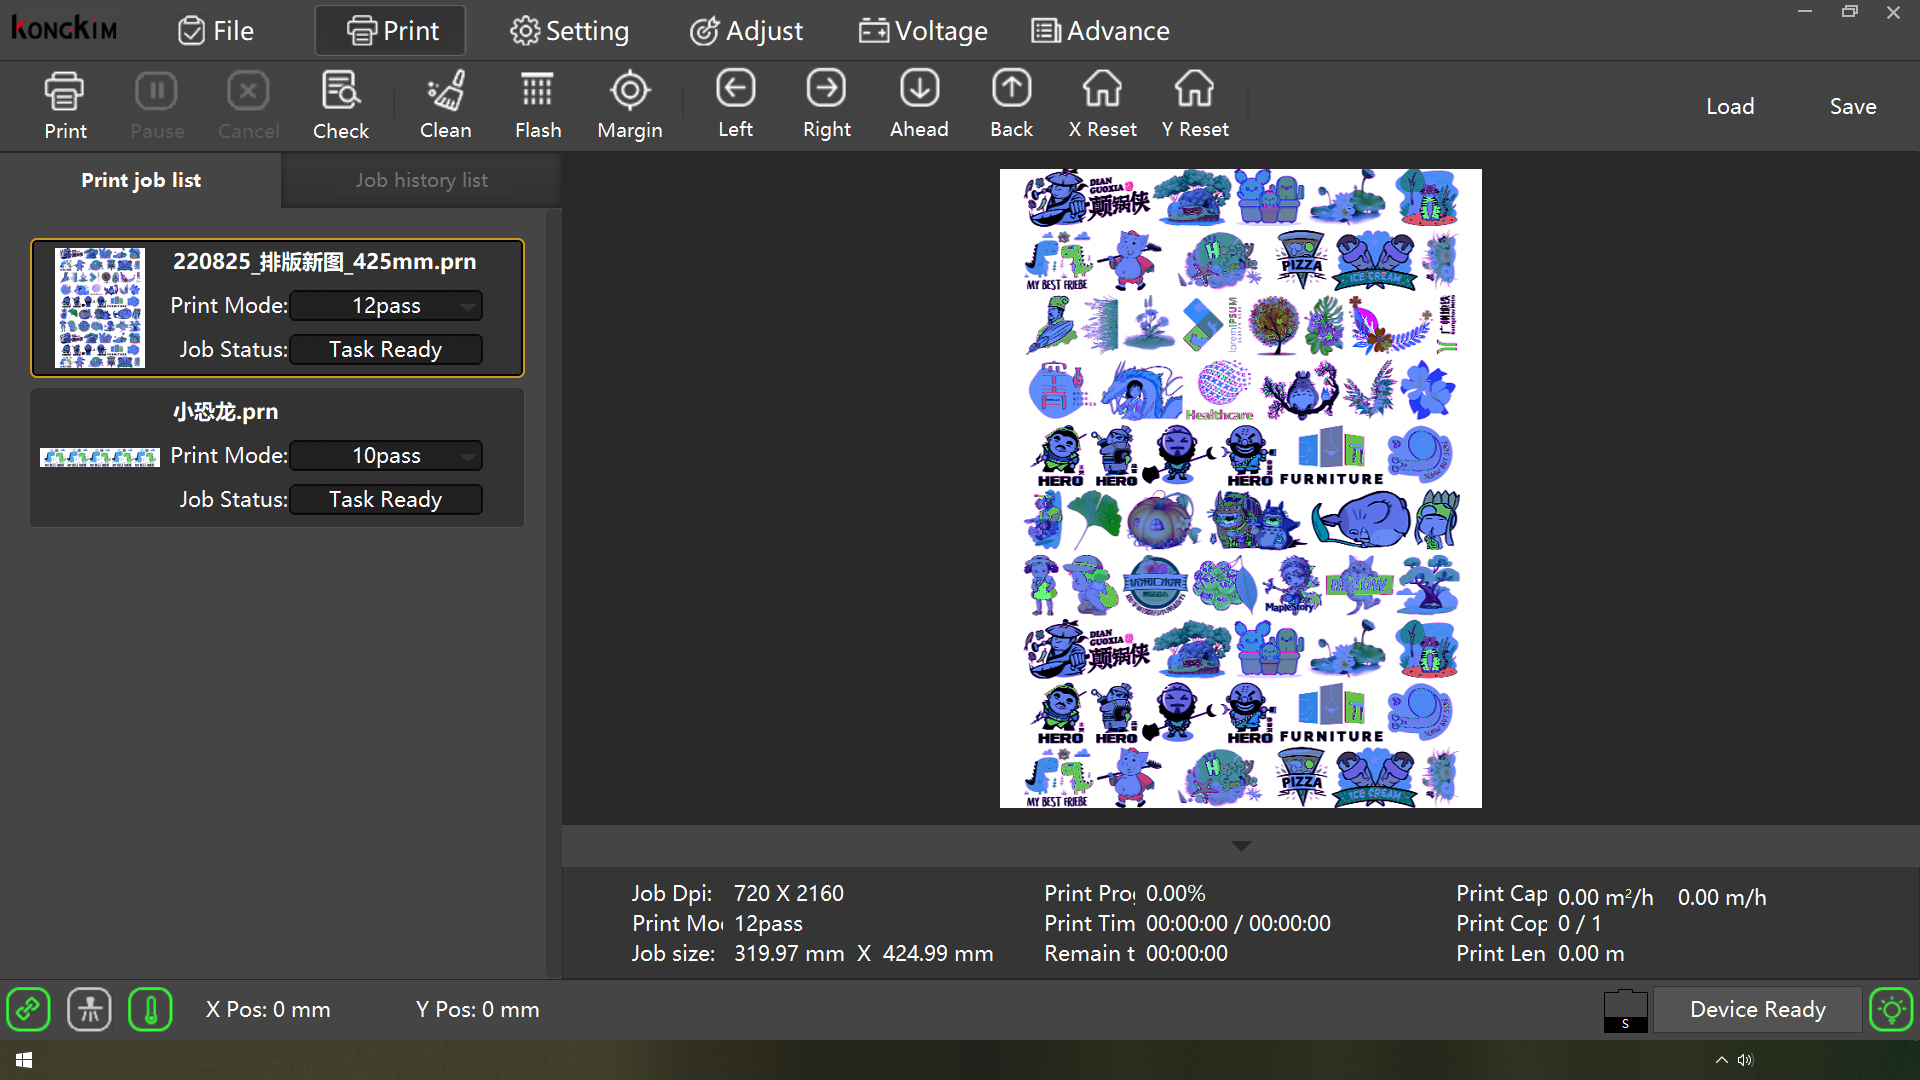
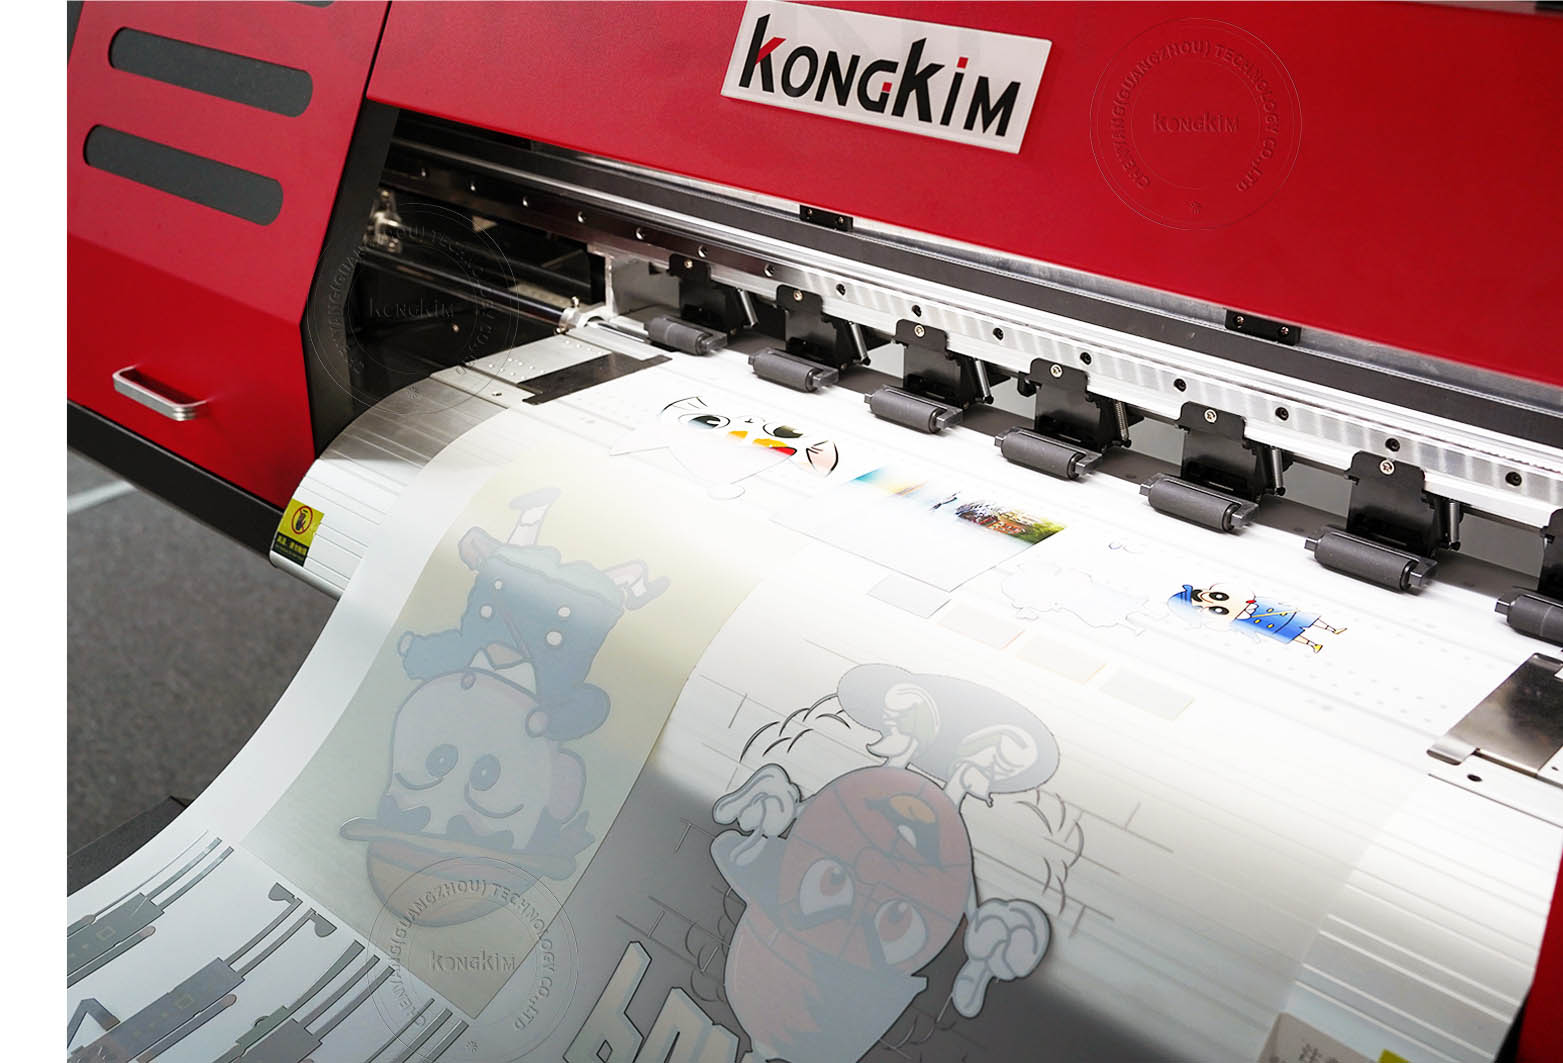
2. Print the Design onto DTF Film
Our Kongkim DTF printer prints the design directly onto special DTF PET film. First, the CMYK colors are printed, followed by a solid white layer to make the colors pop on fabric. This step creates a clean and vibrant transfer.
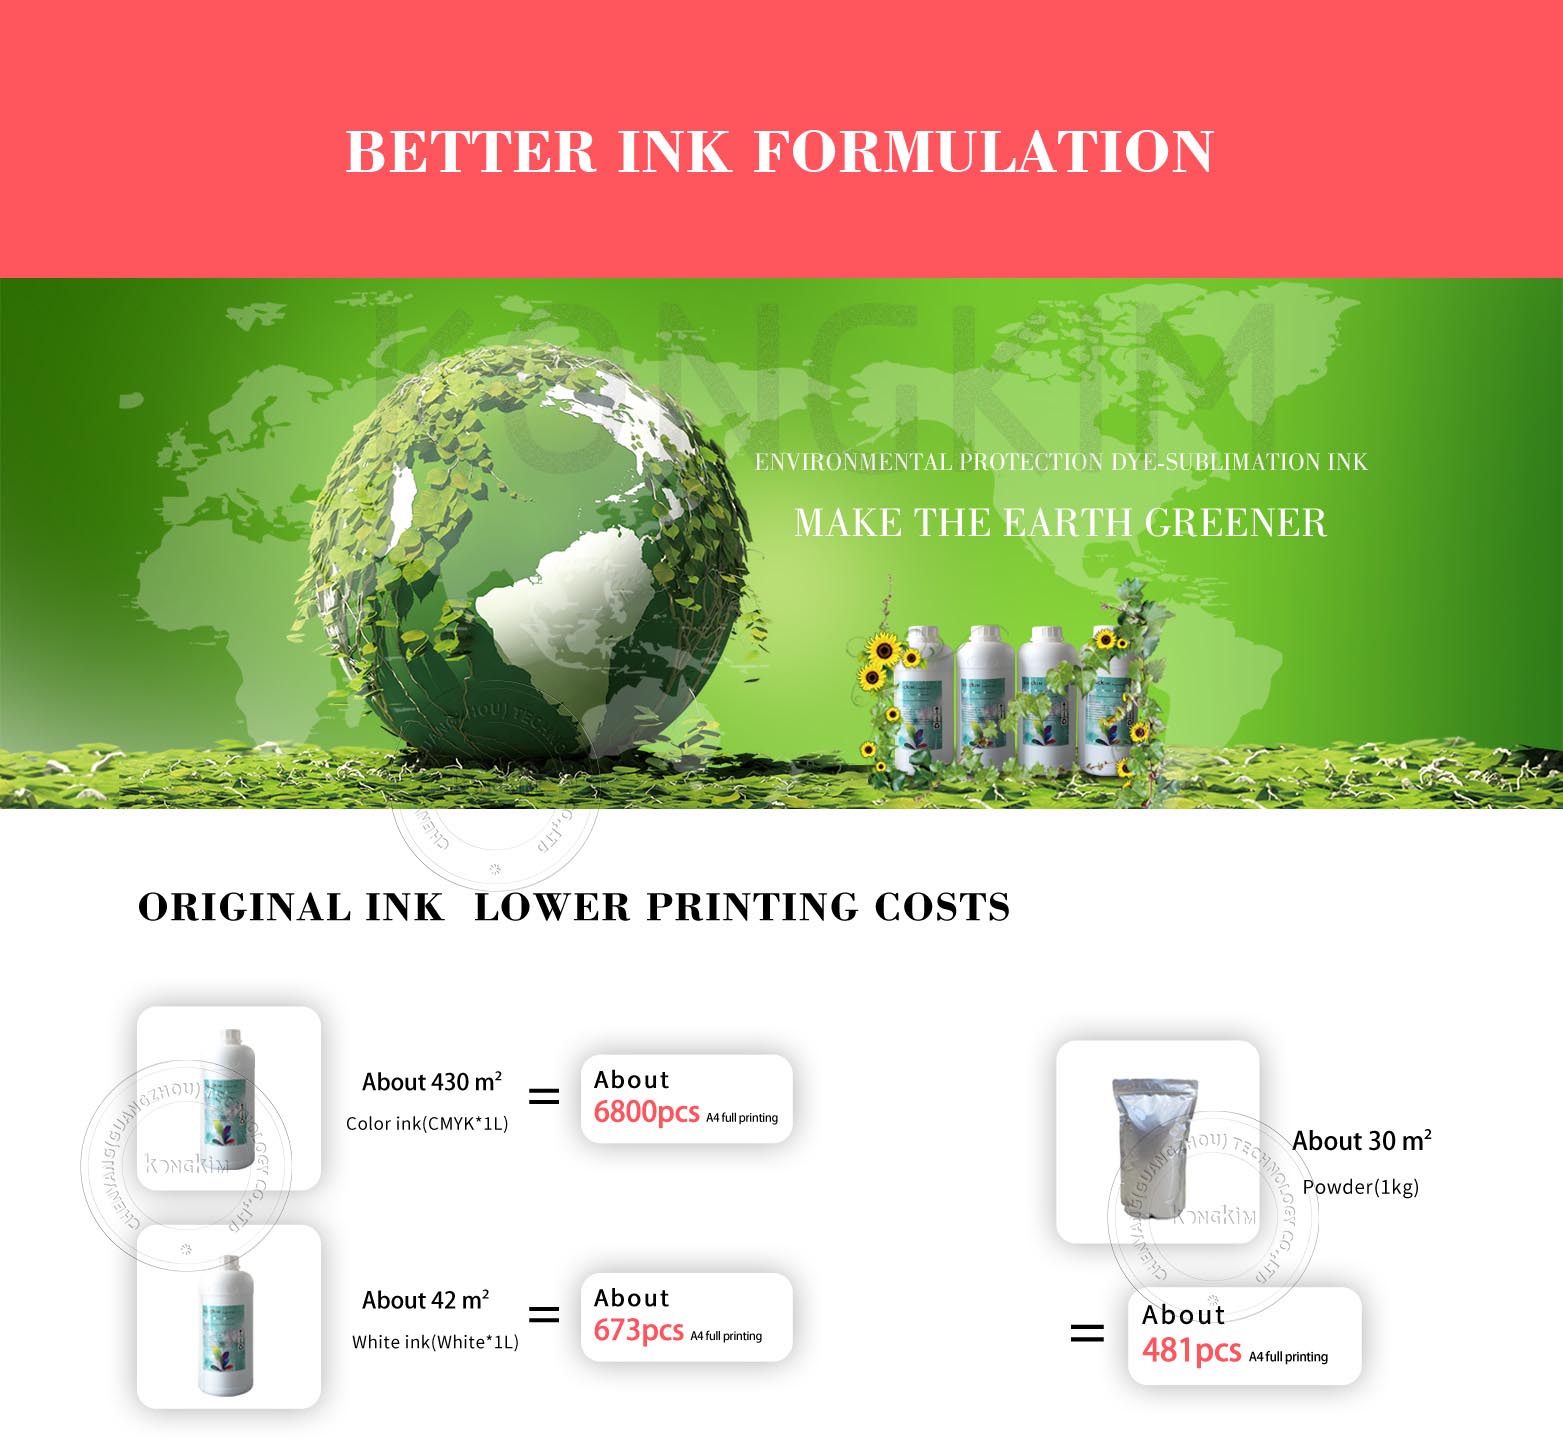
3. Apply and Cure the Adhesive Powder
After printing, fine hot-melt powder is evenly applied to the printed film. The film then goes through a curing process, where the powder melts and sticks to the ink. Kongkim all-in-one DTF printer complete this step automatically for better efficiency.
4. Heat Press the Design onto Fabric
Once cured, the printed DTF film is placed onto the garment and pressed with a heat press machine. After the pressing is complete, the film is peeled off—revealing a bright, detailed, and flexible design.
Conclusion
DTF printing is simple, reliable, and perfect for beginners and professionals. With Kongkim’s user-friendly DTF printers, you can easily complete each step and deliver high-quality results every time!
Post time: Nov-19-2025


